In my last post, I talked about the different types of templates and what they’re used for. Now that we have a feel for what our templates do, let’s take a closer look at one and see what’s going on inside. [Read more…]
Typos Killing Your Code?
One of the most frustrating things that programmers have to deal with is typos. If you forget something regarding syntax or accidentally misspell a variable name, your program can start doing weird and wonderful things or spitting out errors that are less than helpful.
A friend of mine Jonathan Snook recently wrote about this on his blog.
Here’s the code that wasn’t working for him:
Can you see the issue with it? It took me a while to figure it out, and I tried not to read ahead, and once I realized what the issue was, I couldn’t stop seeing it. Unfortunately, if this was part of a many thousand line file, you might never be able to find the error in forrest of code.
if this was part of a many thousand line file, you might never be able to find the error in forrest of code
If you’re more observant than I you’ll notice that the second A is missing in javascript. Without a proper MIME type, browsers don’t process the script leaving you with…nothing. Imagine my amazement when none of my functions worked, with no error messages, no nothing.
I have often forgot to throw in closing quotations in items, or a semi-colon in my PHP that has lead to errors on the screen that were less than helpful. This is always the issue when creating vast amounts of code. Your attention to detail has to be at one hundred percent, or you will find yourself pulling out your hair.
Of course you can build in error reporting that can help with this issue, and there are extensions for Firefox that might help in debugging, but I definitely recommend that developers use an application that does syntax highlighting for their code, as it will sometimes make errors apparent by a line being the “wrong” colour. I currently use Crimson Editor on my Windows box, and Smultron on my Mac. Both applications are free, lightweight and powerful.
Better still though, according to Jonathan and others, are applications that help with completing your code.
The two most popular suggestions seem to be E – TextEditor for Windows and TextMate for Mac. Neither are free applications, but both seem to be considered valuable by a myriad of people.
What are your favourite light-weight, advanced text editor applications, and please, no Dreamweaver.
An Introduction to Movable Type Templates
If you’ve installed Movable Type recently, there’s a fair chance you looked at the templates and were immediately overwhelmed. Don’t feel bad, you’re not the only one. By default, MT ships with no less than 56 different templates — all to publish a blog with a single style. You might find yourself asking…
What are MT templates for, anyway?
The templates in Movable Type format the output of your blog. When you write a blog entry and click Publish, MT figures out — based on the date, category, etc. — which of your template files to use in generating new pages on your blog. It reads each template, plugs in the data from your entry, then outputs the new file as part of your blog.
 As you poke around in the templates, you’ll find some of them refer to other templates, while still others don’t seem to be used at all. And while this can make MT confusing, it also makes it very powerful. All those templates make customizing your blog much easier.
To understand MT templates, you need to understand the different types and what we use them for. MT templates are all about context. The context of a template determines what MT tags you can use within that template. It’s also possible to establish your own context within a template to customize the output. For example, the <mt:entrytitle> tag only makes sense in the context of an <mt:entries>. The individual entry archive establishes that context automatically. But, if you wanted to put a “Featured Entry” in your sidebar, you would need to create an <mt:entries> context within the sidebar.
We’ll get deeper into this in future posts. For now, just keep in mind that context is important for tags, and templates help to establish that context.
Let’s take a look at the different types of templates:
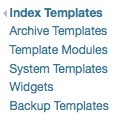
Index Templates
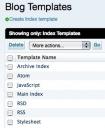 Index templates don’t have a context by default. Instead, you create context within them through the use of container tags. This is a very powerful feature, because it allows you to publish your entries as anything. Index templates are used to produce RSS and Atom feeds for syndicating your blog. You could use one to produce a CSV file that you could import into Excel. Any kind of text file can be generated by index templates — they don’t even need any MT tags in them. You can use them to maintain your CSS and JavaScript files, if you want.
Archive Templates

Archive templates are used to publish entries and pages, either individually or grouped together based on category, date, or author. How an archive template gets published depends on its type (assigned when you create the template) and the archive mappings associated with it.
Archive Template Types
There are three different types of archive templates. The type of template determines what context the template has when it’s published:
- Entry – Entry templates are for individual blog entries. They have an
<mt:entries>context, which is filtered down to a single entry. You can use tags like<mt:entrytitle>,<mt:entrybody>, and others. Typically, this is the template you’ll use to publish an entry and its comments. - Entry Listing – Entry listing templates are for a group of entries. These are your category archives, date-based archives, or author-based archives. They filter the entries to publish based on the archive mapping (more on that in a bit). These templates create a context for tags like
<mt:archivelink>and<mt:archivetitle>, as well as more specific tags based on what kind of archive it is. - Page – Templates for individual pages. These tend to be very similar to Entry templates, since Pages are just entries that exist outside the flow of the blog.
Before you can publish an archive template, it needs an archive mapping. The mapping tells MT where to publish the files and, in the case of entry listings, what type of archive to publish. An archive template can have multiple mappings. This can be used to publish the same templates in different locations. With entry listings, this allows you to use the same template to publish all your archives — categories, date-based, and authors.

Template Modules
Template modules are snippets of template code that are called from other templates. If you are familiar with PHP or SSI, think of it as an include. In fact, that’s exactly how you use it:
<mt:include name="Header">
Template modules do not get published on their own, only when they’re included in another template. You use them for pieces of code you want to reuse. They make it easy to have the same header and footer across all your pages, for example. Anytime you find yourself using the same code in multiple templates, it’s a good idea to evaluate whether you should pull that code out and put it into a module.
System Templates
System templates are used for pages that MT has to generate based on an action taken by a reader, such as posting a comment or searching your blog posts. These have their own contexts, and they have a few quirks because of how they’re generated. We’ll explore system templates more in an upcoming post.
 Widgets
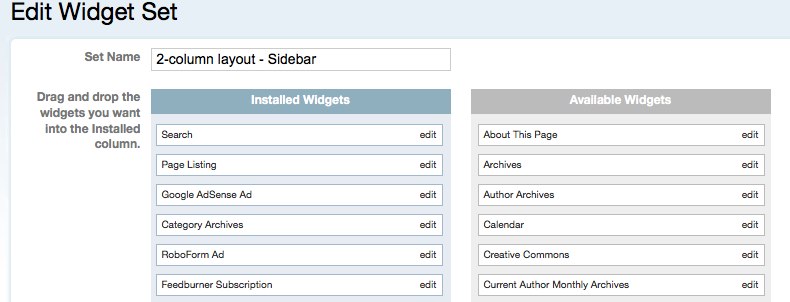
Widgets are just template modules, but by declaring them as widgets we can use them in Widget Sets. Widget Sets give us an easy drag and drop interface for customizing our sidebars, footers, and more.
Backup Templates
 Backup templates are copies of templates that have been replaced by MT. This can happen if you use the Style Catcher to change the look of your blog, or if you use “Refresh Templates” to restore your templates to the defaults.
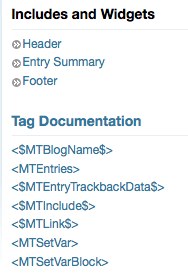
I recommend taking a look at the different templates to get an idea of how they’re structured. We’ll go deeper into this in future posts, but for now just try to get a sense of how the different templates are connected. You can do this by opening the templates and looking at the information to the right of the template. This will tell you what template modules and widgets are included in the template, and what MT tags are used. The tags link to the MT documentation, which can be useful for learning what the tags do.
Have a question about MT templates? Let me know in the comments.
Mashing Up Feeds Using Yahoo Pipes
Yahoo Pipes may just be in beta, but it’s already a great tool for web publishers that wants to add a bit of more flair and life to their websites. It’s in no way hard to mash up RSS feeds using Yahoo Pipes, and I’ll walk you through the most basic way of using the service in this tutorial.
But first of all, why would you want to mash up several RSS feeds into one? Let’s do a list of reasons, shall we?!
- You’ve got a bunch of sites you like and would like to monitor all in one. Mash them up!
- You publish a handful of sites and wants your users to subscribe to them all. Mash them up and offer the feed, through Feedburner if you like!
- You’d like to display relevant stories in your sidebar. Nab the feeds and mash them into one!
That latter one is exactly what we’ll be doing here on the next version of Devlounge, and something I’m adding to the new Wisdump design as I’m writing this.

Let’s Mash Those Feeds
It’s really easy. Go to http://pipes.yahoo.com, click Create a pipe, and sign in with your Yahoo ID (get one if you don’t have one). You get a big grid, a debugger, and stuff to the left for inclusion using drag and drop. Yikes!
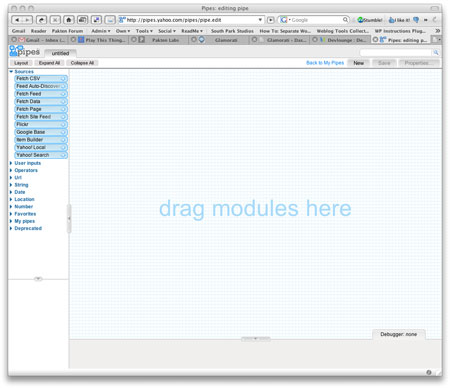
So let’s get started then. We want to mashup these feeds:
- Devlounge’s RSS feed (http://feeds.feedburner.com/Devlounge)
- The Blog Herald’s RSS feed (http://feeds.feedburner.com/blogherald)
- Performancing’s RSS feed (http://feeds.feedburner.com/performancing)
- Blogger Jobs’ RSS feed (http://feeds.feedburner.com/blogger-jobs)
We could add more, but that’ll do for now. I’ve collected the feeds as you can see.
Now, let’s add them. Grab the Fetch Feed badge under Sources in the left menu, and drag it top the big grid. A box gets added, and we also get a second box called Pipe Output. That’s where we want the feeds to land.
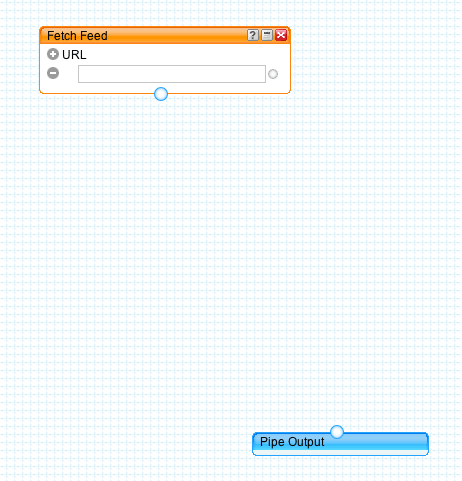
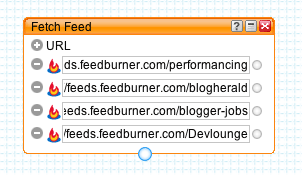
Let’s add the feeds. Paste the feed URL in the input field within the Fetch Feed box. Then click the + sign thrice beside the URL to get three more input fields. Add the RSS feed URL:s in these.
All these feeds are powered by Feedburner, as you can tell by looking at their URL:s, and the little icon to the left of them.
Good.
Now let’s sort them so that the most recent one is on top. Click Operators to the left, and drag the Sort field to the grid. For this we want to sort by item.pubDate (when the items in the mashed up feeds where published) so we’ll pick that from the first dropdown in the Sort box, and we want it in descending orders so we’ll select that in the second one.
Let’s make something off this! Click the circle in the bottom of the Fetch Feed box, and drag it to the top circle in the Sort box. Voilá, they’re connected! Now do the same from the bottom circle in the Sort box, to the Pipe Output box.
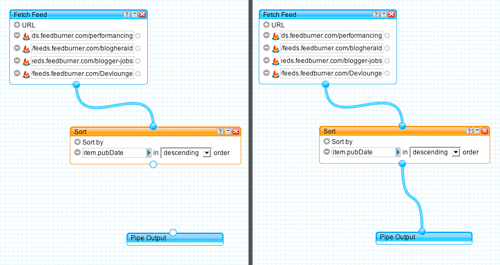
There we are. If you want to test it you can click the Refresh link in the debugger below the grid.
Now click Save in the top right, and name your pipe. When it has finished saving, click Run Pipe at the top of the screen. A new window opens, where you can do stuff with your pipe.
Looks good? Then click Publish to make it accessible. Now, what we want is the pipe’s RSS feed, so click the More options link to the right and Get as RSS.
There you go, one mashed RSS feed containing the latest from four different feeds!
Adding The Feed To Wisdump
So let’s add the feed to Wisdump’s sidebar then, shall we? The pipe’s feed is this: http://pipes.yahoo.com/pipes/pipe.run?_id=bntjQkH73BGSmXmSjknRlg&_render=rss
So how do we add it? With a RSS parsing plugin? We could, but since Wisdump is powered by WordPress, why not just use WordPress’ built-in feed parser? Let’s do that.
This little code snippet is well known, several blogs have reported variants of it. It’s snatched from the RSS feeds in WordPress’ admin.
[html]
items) && 0 != count($rss->items) ) {
?>
items = array_slice($rss->items, 0, 10);
foreach ($rss->items as $item ) {
?>
[/html]
This will spit out a list where each item in the pipe’s feed is a li list item, so you’ll probably want to insert an ul around it.
The key is:
[html]
// insert the feed URL here
$rss = @fetch_rss(‘http://pipes.yahoo.com/pipes/pipe.run?_id=bntjQkH73BGSmXmSjknRlg&_render=rss’);
[/html]
…where you insert the feed’s URL, and:
[html]
items = array_slice($rss->items, 0, 10);
foreach ($rss->items as $item ) {
?>
[/html]
The number of items you want to display. I went with 10 here.
Here’s the code used in Wisdump’s sidebar:
[html]
-
‘>
News From The Network
items) && 0 != count($rss->items) ) {
?>
items = array_slice($rss->items, 0, 10);
foreach ($rss->items as $item ) {
?>
[/html]
You can see it in action over at Wisdump (down a bit in the sidebar), which incidentally has got a new design, so check that out too.
Good luck with your feed mashing!
Permalink Issues When Moving from Typepad to WordPress
So, you have finally decided to take the plunge and move from Typepad, a hosted service, to WordPress’ self-hosted solution, but you don’t want to lose your permalinks that everyone has linked to?
See, when you export from Typepad it doesn’t keep your post slugs intact, so WordPress generates some of its own, based on the title of the post. This means the URL you had before is no longer correct. Firstly, Typepad added a .html on all of your post related links. WordPress doesn’t do this by default.
To change this, all you need to do is go to the Options -> Permalinks section, and select date and name based. In the custom box, it will fill in:
/%year%/%monthnum%/%day%/%postname%/
From here, change the ending to:
/%year%/%monthnum%/%day%/%postname%.html
This should now make your permalinks to your posts similar to your TypePad settings you had, but with one glaring difference. TypePad truncates the link to fifteen characters, while WordPress allows you up to two hundred characters. This is an important difference when your post title is something like “Permalink Issues When Moving from Typepad to WordPress”.
In TypePad that would be shortened to:
permalink-issue.html
Whereas in WordPress it would be:
permalink-issues-when-moving-from-typepad-to-wordpress
To fix this issue, there are many different things you can do. I have seen tutorials that require some complex, though interesting SQL queries that unfortunately don’t always work for the non-programmer/SQL expert.
Here is an example from Mo Jebus:
UPDATE
When I read this, I scratched my head. Surely, there must be an easier way to truncate the post slugs in WordPress to be fifteen characters, thus fixing most, if not all, of the permalinks so any links to the posts you once had, are still valid.
What about altering the table, so that the post_name, which is where WordPress generates its permalinks, is no longer than fifteen characters long? I then used an SQL query in phpMyAdmin to alter the table and shorten the post_name which worked perfectly for Sarah in Tampa, the site I was working on. Once we completed the first query, we re-ran it again, changing the field back to WordPress standard.
Here’s what I used:
ALTER table wp_posts modify post_name varchar(15)
After which I then changed it back by running:
ALTER table wp_posts modify post_name varchar(200)
That was it. Sarah had her permalinks the same as they were on Typepad, and so anyone clicking an external link should be brought to the correct post on her new WordPress powered blog.

