We successfully upgraded to WordPress 2.0.5, which was just released a short time ago. We haven’t found anything wrong since the upgrade, but if you encounter some kind of odd error let us know. In other news, the podcast page is finally up! As of right now the page is a bit empty. We’ll be finishing it up tomorrow and then we’ll begin to populate it. We have a lot of ideas on turning existing content in audio format (using Talkr) as well as new podcast only content. Drop us your suggestions!
Search Results for: wordpress
The Ultimate bbpress Guide
BBpress, the latest project from team WordPress finally reached its first public release a few days ago. BBpress was in development for ages, and I was never able to get early versions to work right alongside WordPress, so I scrapped any ideas of having an integrated forum for Devlounge.
But with the first public release, WordPress integration has been cleaned up, and now it’s our turn to help you customize bbpress like we’ve done for wordpress, in the Ultimate BBPress Guide.
Let’s Install
The installation process for bbpress is incredibly simple, as it is in installing WordPress. The entire process contains of 3 steps: edit config, upload, and run installer. Can’t get much simpler than that.
First, let’s upload the contents of “bbpress-0[1].72/bbpress…” into a folder on your web server. If you plan on integrating the user database with an existing wordpress database, make sure to upload the bbpress folder inside the location of your wordpress install, ie if wordpress is installed under “www.yourdomain.com/blog”, upload the bbpress folder and its contents to “…blog/bbpress/”.
Next, we need to edit the config file. Open either the local or remote copy of config-sample.php to do some editing. You’ll need to have created a mysql database, unless you plan on integrating with wordpress, in which case you’ll need to use the wordpress database information. (If you can’t seem to remember your WP database information, download your wp-config.php file from the server so you can grab the information required.)
Now let’s take a look at the config-sample.php file you just opened up:
[php]domain = ‘http://my-cool-forums.example.com’; // Example: ‘http://bbpress.example.com’
// There should be both a leading and trailing slash here. ‘/’ is fine if the site is in root.
$bb->path = ‘/’; // Example: ‘/forums/’
// What are you going to call me?
$bb->name = ‘New bbPress Site’;
// This must be set before running the install script.
$bb->admin_email = ‘[email protected]’;
// Set to true if you want pretty permalinks.
$bb->mod_rewrite = false;
// The number of topics that show on each page.
$bb->page_topics = 30;
// A user can edit a post for this many minutes after submitting.
$bb->edit_lock = 60;
// Your timezone offset. Example: -7 for Pacific Daylight Time.
$bb->gmt_offset = 0;
// Your Akismet Key. You do not need a key to run bbPress, but if you want to take advantage
// of Akismet’s powerful spam blocking, you’ll need one. You can get an Akismet key at
// http://wordpress.com/api-keys/
$bb->akismet_key = false;
// The rest is only useful if you are integrating bbPress with WordPress.
// If you’re not, just leave the rest as it is.
$bb->wp_table_prefix = false; // ‘wp_’; // WordPress table prefix.
$bb->wp_home = false; // WordPress – Options->General: Blog address (URL) // No trailing slash
$bb->wp_siteurl = false; // WordPress – Options->General: WordPress address (URL) // No trailing slash
// Use the following line *only* if you will be loading WordPress everytime you load bbPress.
//define(‘WP_BB’, true);
/* Stop editing */
define(‘BBPATH’, dirname(__FILE__) . ‘/’ );
require_once( BBPATH . ‘bb-settings.php’ );
?>
[/php]
As you would with any database backed scripted, you’ll need to fill in the database name, mysql username, password, and host, which is almost always “localhost” and can be untouched. If you’re integrating with wordpress, simply input the WP database information into this area.
Next you’ll need to move to lines 12-17 and set the domain name and then the location of the bbpress directory. Following the instructions in the config file itself will guide you through setting the rest of the variables. When you get down to lines 43 and 44, you’ll notice a note saying that the rest is only useful when integrating with the WordPress database.
If you are integrating with WordPress like I happen to be during this test install, we’ll need to edit the final three config variables dealing with wordpress. The first is setting the wordpress table prefix, which unless you changed it, it will be ‘wp_’. Delete the “false” and replace it with the table prefix name. It will look something like this:
[mysql]$bb->wp_table_prefix = ‘wp_’; // ‘wp_’; // WordPress table prefix.[/mysql]
Next you’ll have to set the blog url and site url, both pulled from the wordpress admin panel under “Options>General”. Almost every time the wordpress url and blog url will be the exact same. In this case it was “http://astereostudio.com/on”, so after setting this in the config lines 47-48 looked like this:
[mysql]$bb->wp_home = ‘www.astereostudio.com/on’; // WordPress – Options->General: Blog address (URL) // No trailing slash
$bb->wp_siteurl = ‘www.astereostudio.com/on’; // WordPress – Options->General: WordPress address (URL) // No trailing slash[/mysql]
When you’ve setup all the neccessary variables, save the file as config.php and upload it to the root of your bbpress install, or if you we’re using a live remote copy, simple save it and rename it to config.php.
Note: If integrating with wordpress, there is a WordPress plugin and BBpress plugin to fix some of the early version problems of bbpress and wordpress user database sharing.
Running the Installer
Head over to the location of your bbpress install in a web browser. Ours happened to be http://www.astereostudio.com/on/forums/, which lead us to a nice message saying it didn’t look like we had installed bbpress yet. This then brought up to the installer, which looks pretty damn familiar to WordPress.
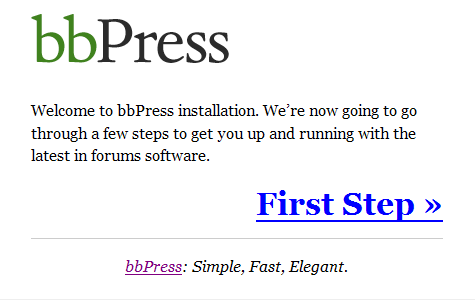
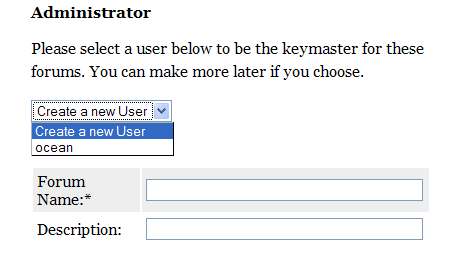
After hitting first step you’ll be brought to the forum setup screen, which will ask you to fill out the forum name and description. If you were integrating with wordpress, this screen will also become very important! If you did everything right, there should be a dropdown menu listing your wordpress admin account username. Selecting this means your integration was successful, and your forum admin login will be the same as wordpress.
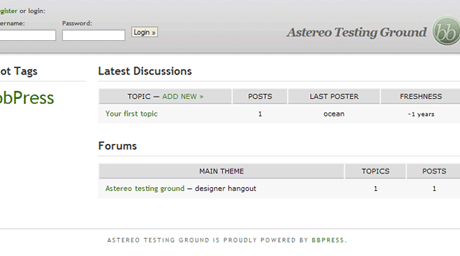
After hitting the “Continue to Step 2” button bbpress will run through and create its tables, and if everythings correct you will be then brought to the bbpress homepage.
On the next page we’ll dive right in and customize this baby!
Friday Focus #2
Sites of the Week
Sites that caught my eye in css galleries over the past week, now with brief overviews of why I like them. Clicking the screenshots will take you to the entire sites.
C-Ville is a Colorado based initiative to get youths to avoid smoking. The site features an excellent use of flash and xhtml. An amazing combination and great purpose.
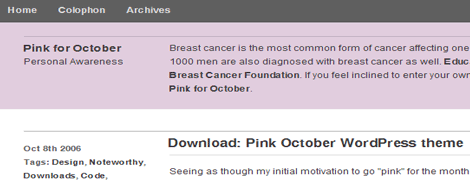
October is the official “Breast Cancer Awareness Month”, and as part of this awareness campaign, many sites go pink for the month. Derek at 5thirtyone updated his site with a white / grey / pink design, and released it publicly as a wordpress theme. An excellent way to get the word out.
Apples to Oranges. Clean, crisp design. Explains itself.
Digg Weekly
Design: Using Photoshop CS2 to Create Hi-Res HDR Images
An excellent tutorial on using Photoshop CS2 to create HDR images. Go through every step along with pictures so you can see what you’re doing. My design pick for the week.
Programming: The Difference Between Programmers and Developers
An article that talks about the differences between programmers and developers. A nice read that helps distinguish things between the two.
Application of the Week
I didn’t notice anything new hitting the radar this week. We’ll really go searching for something new for next week. Have your own web application / project you think we should have a look at? Drop us a line today.
Weekly Opinions
This design has been up for a little bit longer than a week now, and so far I have received all good response. We want to know from you what are some topics you want us to discuss. We’re all about listening to our readers and putting out content you want, so don’t hesitate to ask us to write about things, regardless of how silly they may be to experienced developers. If it will help you, chances are it will help others. Drop us a note in the comments.
Extra, Extra – New DL
As you can see, this is our new extras page. Over the next few days it will become the one resource for updates on all our homegrown WordPress templates, free downloads, and much more. Just give us a few days to get this section is check.
Designers – Protect Your Content
We’ve all seen those anti-piracy ads that Hollywood is so fond of. You know, the ones about stealing cars, DVDs, and purses. The ad tries to tell us that if we don’t steal any of those things, then we shouldn’t pirate movies either. Perhaps Hollywood should add one more item in there along with the cars and purses: “You wouldn’t steal anybody’s web content, right?” If you are a writer for the web, you should be worried about people stealing something that is very dear to you: your content.
Why on Earth would someone want to steal your content — your written text that you have spent hours upon hours creating? The amount of time and sweat that is put into creating content is tremendous; now some creep can come along and steal what is rightfully yours.
An increasing pain among content-generators (aka, bloggers) is the common splog, or spam blog. These blogs can take the form of blogs with randomly generated keywords that make absolutely no sense. They can also take the form of your content with a bunch of ads interspersed. With splogs taking your content and advertising within, that means that someone else is making money on the content you are creating! So what do you do about it?
Fortunately, for those who use the WordPress blogging platform, there are several plugins that assist bloggers against the evil splogs. One of the more notable plugins I have come across is called AntiLeech. I will devote the rest of this entry as a review of the plugin and how it deters sploggers.
AntiLeech Description
As described on the AntiLeech plugin page, AntiLeech does not stop sploggers from accessing your content. The plugin does, however, allow you to control what content the splogger receives.
Installation
Installation of the plugin is relatively straightforward. Just unzip the .php file in your WordPress plugin directory on your web server. From there, you can activate or deactivate the plugin within the “Plugins” Administration Panel.
One thing to note here is that if you have Steve Smith’s(Ordered List ) FeedBurner Plugin installed, now is the time to deactivate it. The reason is that AntiLeech and the FeedBurner Plugin do not play well together. Never fear, because AntiLeech has its own FeedBurner redirect.
Configuring the FeedBurner Redirect
You’ll find all of AntiLeech’s options under the Options Administration Panel. Here are a few steps to follow to make sure your FeedBurner redirect is successful:
- Edit your feed details at FeedBurner and change the url to:
http://www.yoursite.com/feed - Under AntiLeech’s plugin options, enter your FeedBurner Address under FeedBurner URL.
- Select what you want included in the feed.
- Click “Update.”
That should about do it for the FeedBurner redirect.
Configure the Splog Content
Here is where the magic of AntiLeech begins. You can choose what content sploggers receive.
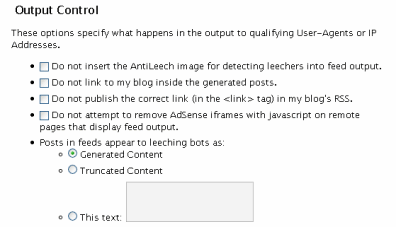
In order to detect leechers, AntiLeech places a small image that says “ANTILEECH” at the bottom of every feed entry. You can enable or disable this option.
You can also choose not to include links back to your content. This is where everything gets controversial. Sploggers can potentially kill your search engine rank because there is duplicate content out there. The search engines might eventually think that you are spamming as well. One of the ways to combat this is to give the splogger garbled content, but still include a link back to your site. Now will Google punish you if a splogger links back to your site? I leave that answer open for debate. The point is, the choice is yours if you want the splogger to have a link back to your site.
You can also change the content that the splogger will receive. Here is an example of what the splogger might receive using Generated Content. You can also choose to give the splogger Truncated Content (post summaries) or alternatively leave some choice words for the would-be splogger.
Choosing a Splogger
There are two ways you can set up who is or isn’t a splogger: one is by User-Agent, and the other is by IP Address.
You can add a splogger by User-Agent by selecting any User-Agent that AntiLeech has detected. You can also manually add in a User-Agent.

If AntiLeech hasn’t detected any User-Agent, but you have noticed a couple of IP Addresses that are sucking down your pages, you can add those IP Addresses to your splog list.

Conclusion
Overall, I feel that the AntiLeech plugin for WordPress is very well done. One thing I would like to see in a future release is some statistics for the added IP Addresses and User-Agents (such as highest daily page view). Of course I could always view my site stats, but this way the information would all be in one place.
If you have WordPress, hate people stealing your content, and want to get back at the evil sploggers, then AntiLeech should be your anti-splog plugin.

