jQuery is one of the best-known development tools available, and since its emergence just 10 years ago, it’s exploded in popularity. In fact, it powers roughly 65 percent of the top 10,000 most popular sites on the Internet. So what exactly is it, and is it worth learning? [Read more…]
Search Results for: tutorials
Tools for Designing and Publishing an Infographic on a Budget
As a designer on a budget, creating and publishing an infographic might seem daunting. It can be hard to figure out where to get started – but it’s not impossible. With virtually endless choices for design tools, templates, and programs, as well as a wide variety of potential venues for publication, you don’t have to work from scratch. [Read more…]
Get Coupon Codes for The New Colossal Bundle of Inky Deals PLUS a Freebie!
Being a designer and/or developer entails using a lot of tools to help you create the best results for your projects. Whether your projects are for paid clients or for personal pleasure, the goal is the same: to make something you’re proud of. With some sweat (and sometimes, blood) plus the right resources, you can make your life easier as you reach toward whatever goal you have for the moment.
This is where deals site Inky Deals comes into the picture. The web site is one of the biggest deals sites catering to designers – from amateurs to pros – and they always put together some of the best bundles so design enthusiasts can make great savings.
And, believe it or not, Inky Deals has this 200% money back guarantee going on; so, if you do not like what you have bought from them, you can get all your money back PLUS you get to keep the product. Now if that isn’t neat…!
As we end the week, we’re proud to announce a partnership with Inky Deals for The New Colossal Bundle with $10,063 worth of Top-Quality Resources – From $49.

Cutting right to the chase – you guys can make even more savings by using this exclusive $9 discount coupon for Devlounge readers: INKYCOLOSS9. Use the code at checkout, but make sure you do so before Sunday, April 13th, when the code expires.
While that image does give you an idea just how much is on the table, let’s give you a clearer idea of what’s included in the bundle.
The New Colossal Bundle

- 117 Vector Sets worth $1,755
- 425 Vector Illustrations worth $1,700
- 40 T-shirt Designs worth $600
- 18 Texture Packs worth $265
- Tatianna Font Family worth $35
DesignTNT Massive Library

- 233 Vector Sets worth $2,290
- 101 Web & Print Resources Packs worth $1,070
- 109 Photoshop & Illustrator Addons worth $1,036
- 69 High-Resolution Texture Packs worth $729
- 67 Brushes Sets worth $486
- 10 Premium Tutorials worth $97
Feeling overwhelmed? Probably only because of the amount of resources that are at your fingertips!
Here’s something that will get you even more interested: this entire bundle comes with an extended royalty license, which basically means that you can do whatever you want with the tools. Whether you use them for a personal, non-commercial project, or you use them for a paying client, you are free to do so! The license also allows you to make use of the tools for any medium – online, print, or even merchandise.
But we’re not done yet.
Here’s a freebie.
Download an amazing freebie pack with 4 vector illustrations, 4 textures, and a T-shirt design. This pack is worth $35, but Inky Deals wants you to have a peek and see what they have to offer. When you download this freebie pack, you can use the tools however way you want.
Whether you get the freebie and/or the New Colossal Bundle, you’ll end up with a whole lot of things to play with!

Click here to view everything included in this amazing bundle!
Smart and Easy Remote Web Conferencing
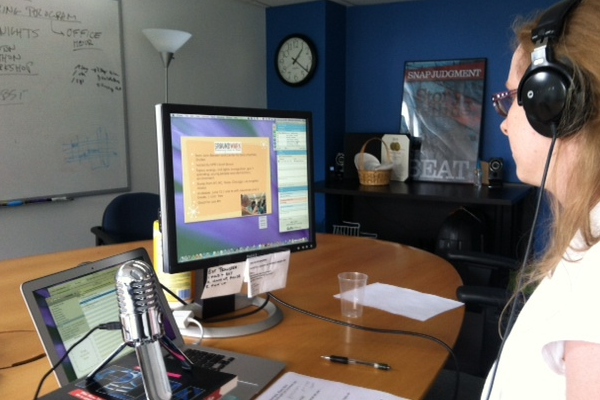
The ability for teams to communicate with each other has grown rapidly in the past decade. We can find examples all over the Internet which provide companies a method of teleconferencing meetings and tutorials. You can even locate fun examples online related to technology and educational speakers from around the world.
I think a good place to start is by asking what is a webinar? The explanation is a web-based seminar – something that can teach and educate listeners directly from the web. Lectures, workshops, keynote speeches, and similar events will all work perfectly as webinars. One important aspect is that webinars allow viewers to share data back and forth with each other. This is not simply a static video stream, but it offers dynamic interactions from team members.
How to add Pinterest’s “Pin It” button on your WordPress and Genesis Framework site

Pinterest is probably the hottest sharing and organizing social network today, and if your website’s community has jumped on the pinning bandwagon, make sure it’s easy for them to share and save your stuff with the “Pin It” button. Here’s how you can add it to your WordPress site (including Genesis Framework-powered sites).
Install a Pinterest Pin It WordPress Plugin
The most painless route would be installing a Pinterest WordPress Plugin. There are already a few competing ones available at the official plugin repository such as Pin It On Pinterest (by bahia0019) and Pinterest “Pin It” Button (by pderksen).
If you’re using an existing social button service like AddThis, Slick Social Share Buttons, or Social Linkz, you’ll be happy to know that these plugins support Pinterest already.
Add the Pinterest Pin It button to your WordPress Theme
The button code which you can get from the Goodies page requires an image URL in addition to the usual post URL, so in this case we’re using the built-in Post Thumbnails feature.
In single.php and places where you call The Loop, add this code:
[php]
<?php $pimage = wp_get_attachment_image_src(get_post_thumbnail_id(get_the_ID()));
if ( $pimage ) { ?>
<div class="pinterest"><a href="http://pinterest.com/pin/create/button/?
url=<?php echo urlencode(get_permalink()); ?>
&media=<?php echo urlencode($pimage[0]); ?>
&description=<?php urlencode(get_the_title()); ?>"
class="pin-it-button" count-layout="horizontal">Pin It</a></div>
<?php } ?>
[/php]
Depending on the type of button you want, you can change the value “horizontal” to “vertical” or “none”.
In footer.php, add this code to the bottom, right before </body>:
[code lang=”js”]<!– Include ONCE for ALL buttons in the page –>
<script type="text/javascript">// <![CDATA[
(function() {
window.PinIt = window.PinIt || { loaded:false };
if (window.PinIt.loaded) return;
window.PinIt.loaded = true;
function async_load(){
var s = document.createElement("script");
s.type = "text/javascript";
s.async = true;
if (window.location.protocol == "https:")
s.src = "https://assets.pinterest.com/js/pinit.js";
else
s.src = "http://assets.pinterest.com/js/pinit.js";
var x = document.getElementsByTagName("script")[0];
x.parentNode.insertBefore(s, x);
}
if (window.attachEvent)
window.attachEvent("onload", async_load);
else
window.addEventListener("load", async_load, false);
})();
// ]]>
</script>[/code]
Insert the Pinterest Pin It button to your Genesis Framework WordPress site
If you use the Genesis Theme Framework, just add the above JavaScript to the footer script text box in the Genesis Options page, then add this to the functions.php file in your child theme:
[php]
add_action( ‘genesis_post_content’, ‘pinterest_pin_it_button’ );
function pinterest_pin_it_button() {
$pimage = genesis_get_image( array(‘format’ => ‘url’) );
if ( $pimage ) { ?>
<div class="pinterest">
<a href="http://pinterest.com/pin/create/button/?
url=<?php urlencode(get_permalink()); ?>
&media=<?php echo urlencode( $pimage[0] ); ?>
&description=<?php echo urlencode(get_the_title()); ?>"
class="pin-it-button" count-layout="horizontal">Pin It</a>
</div>
<?php }
}
[/php]
This adds the button after the entry text. You can also choose from other Genesis Hooks for a different location on your blog.

